Upload Files to File Manager
Use this procedure to upload files to File Manager. An uploaded file is available only to you; the file is not available to your students until you post it. The maximum file size you can upload is 5 MB, and the capacity of your File Manager space is 50 MB.
Tip: Make sure to save copies of the uploaded files on your computer in the event that you need to upload them again in the future.
To upload a file:
- Open the File Manager.
- (Optional) Click the list of allowable file types link to display a list of supported file types.
- Click the folder (in the My Files list) into which you want to upload the file.
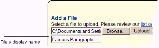
- Click the Browse button and select the file to upload.
- (Optional) Enter a display name for the file in the text box below the Browse button.
The display name is the name you and your students will see. If you do not enter a display name, the MyLab displays the file name instead.
- Click the Upload button.
File Manager uploads the file and adds it to the folder. If needed, you can also move the file to another folder.
To make an uploaded file available to your students, post it on the Home page.
See also:
Set Up Folders | Post Files to Students | Move Files from One Folder to Another | Make Files Inaccessible to Students | Delete Uploaded Files