Highlights, notes, and the Notebook
Updated 17 Jan 2024
Add highlights in the eTextbook. You can also add a note for a highlight. Use the Notebook to add notes independent of a highlight and to filter or export your notes. Later you can search on a term to find any relevant note you may have added.
In addition, instructors can share their highlights and notes with the course participants.
Any notes with a blue highlight are notes the instructor has shared with the class.
- From a book page, drag to select the content you want to highlight. In select eTextbooks you can also highlight figures, tables, images, and videos.
You cannot overlap highlights or add more than 100 highlights (or highlights with notes) per page.
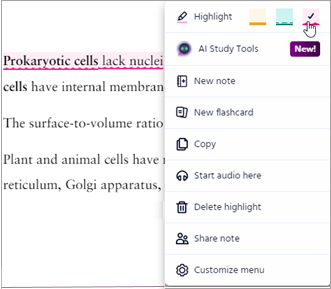
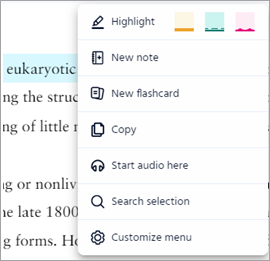
- Select a highlight style (yellow, green or pink) next to Highlight on the menu that opens.

- Share your highlight with the class —
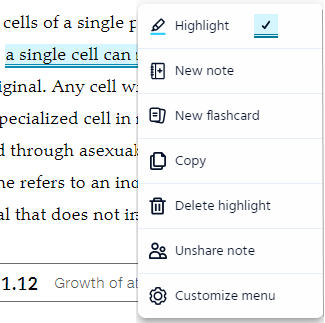
As instructor course owners add, edit, or click in a highlight, choose Share note from the menu that opens. The highlight changes to the blue style and displays the same way to everyone in the course. (To stop sharing the highlight with the class, click in the highlight then select
  Unshare note.)
On the book page,
 shows in the margin next to the highlight for all class participants. (Shared highlights show in the eTextbook of course copies created by the same Pearson account.) To share notes with your class, see step 3 below.
 - Show/hide all highlights —
Select from the menu then select Show highlights. The default is to show highlights.
If you hide the highlights, any note markers (
 or
or  ) remain in the margin.
 - Delete a highlight later —
Click in the highlighted text so the menu opens, then select either Delete highlight or
  Delete highlight and note.
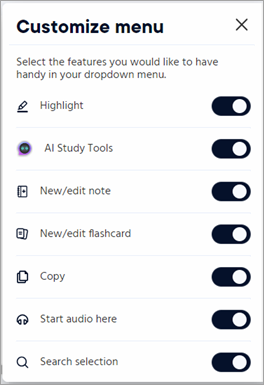
 Customize menu (to reduce the options shown)
- From a book page, select some text then choose
 Customize menu.
 - Select whether to hide or show menu options, such as for Highlight.

- Share your highlight with the class —
- Add a note associated with this highlight (Optional).
Select New note, enter your text, then select Save. Format options for note text include bold, italics, numbered or unnumbered lists, and more.
 shows in the margin next to the highlight. The note is added to your
  Notebook.
- Share a note with the class — As you add or edit a note, select Share note then select Save. (The sharing option displays only to the course creator in browser view, not in the Pearson+ app
 . ) On the book page,
  shows in the margin next to the blue-highlighted text for all class participants
 - Edit a note (highlight color, note text or style, or delete) —
On a book page, select or
or  next to the note highlight, then make your edits. Or select
  from the menu and right-click on a note to choose
  Edit note.
 - Review all notes associated with a highlight —
Select from the menu. See the Notebook section below for details about using Notebook features to study.
- Share a note with the class — As you add or edit a note, select Share note then select Save. (The sharing option displays only to the course creator in browser view, not in the Pearson+ app
Applies if you share notes in your eTextbook with the class.
- View an individual instructor note —
Select that shows next to blue-highlighted text on a book page.
 - Review all instructor notes —
- Select
 from the menu.
 - From Color, select Blue - Instructor note.
- Select Apply.
To turn off the Notebook filter later —
Select Color, then Reset filter.
- Select
You can share instructor eTextbook notes among your courses that use the same edition textbook.
Copy the course —
This is the easiest option, usually done before the start of the course term. The copy must be based on the same edition textbook.
Copy the notes —
Copy the notes from an eTextbook into same edition eTextbooks in other courses, which can be done at any time.
Create another course —
If you use the same Pearson account to create another course with the exact same eTextbook, any notes and highlights from the earlier course show in the newly created eText.
Copy a course using the same edition book. The eTextbook notes and highlights show in the eTextbook of the new course. Do this before the start of the next school term.
This feature doesn’t apply to PDF eTextbooks.
PDF eTextbook customers see instead the next section “Copy instructor notes from one eTextbook into another.”
How do I know if I have a PDF eTextbook?
The pages in a PDF eTextbook match the print book exactly.
This feature might not display in your eTextbook.
- Open the eTextbook from each course at least once. (This allows the eTextbook copy notes process to locate your courses.)
Important: You must be the owner of each of the courses you want to copy eTextbook notes to or from. (If you’re coordinating a course group and other instructors created their own member sections, you’re unable to copy eTextbook notes into their courses.)
- Open either the eTextbook that contains the notes or the one into which you want to copy the notes.
- Select
 from the menu, then choose Copy notes.
Don’t see the “Copy notes” option?
This means you don’t have to copy any notes. All of your eTextbook notes for the current book are available to you, no matter which course you launched your eText from. - Choose whether to copy the eTextbook notes TO or FROM another course. Only courses that contain copyable notes display in the list.
- Copy notes from the eTextbook of another course into the current eTextbook — Accept the prefilled TO and select the course name with course ID that you want to copy the notes FROM. Only courses with copyable eTextbook notes are provided in the check box list.
- Copy your notes from the current eTextbook into the eText of another course — Select
 to reverse the copy direction. Then select the course TO which you want to copy your eText notes.
- Select Copy notes.
Any instructor shared notes are viewable by all course participants.You can’t undo this action. If you copy notes you don't want, you can delete them individually later.
You can copy and paste text from your eTextbook.
- From a book page, select the text you want to copy.
- Select
 Copy.
Copy.
- Anything beyond the copy character limit does not copy. You cannot copy protected images, tables, or videos.
- On mobile devices you might be unable to copy math or chemistry equations and other special notation.
- Paste the copied content into another resource using a paste command for your device.
From an eTextbook open in a browser, select your initials (top right) to open your account settings, then select Print page to print a page at a time.
- Not all eTexts provide the print option. When available, the Print page option shows after Title info.
- The Pearson+ app
 for eTextbooks does not support printing.
Notebook in your eTextbook
Students can use the Notebook to help them study and prepare for tests. Your Notebook contains notes you add (with or without an associated highlight) as well as any instructor-shared notes. The Notebook for your eTextbook might provide some or all of the features described below.
Select  from the eTextbook menu to open the Notebook, whether working in your eTextbook in a web browser or in the Pearson+ app.
- Edit a note (highlight color, note text or style, or delete) —
From the Notebook, right-click on a note (web), select Edit note, make your changes, then select Save. Format options for note text include bold, italics, numbered or unnumbered lists, and more.
 - See the book context for a note —
From the Notebook, either select the highlighted text in a listed note or right-click then select View in content. You might need to scroll to find the highlight in the book section.
From the Notebook  , select
  to add notes not associated with a book highlight. You can associate the note with a chapter or choose No chapter.
- Other notes —
Notes without a book highlight and not associated with a chapter show at the bottom of the Notebook in the section Other notes. - Notes exported from AI Study Tools —
When AI Study Tools are available in your eTextbook, you can export a formatted response from the AI Study Tools chatbot to a note.
- Select
 from the menu to open the Notebook.
 - Make selections to filter your notes by chapter or highlight color, then select Apply.
Color options include yellow, green, pink, blank, or blue - instructor note.
- Filter for notes without a highlight —
Select Colors, then Blank. - Remove the current filter —
Select Chapters or Colors, then Reset filter.
- Filter for notes without a highlight —
- Select
 from the menu to open the Notebook.
 - Prepare the list of notes you want to export.
You can filter your notes by chapter or highlight color. See the section above for filter details. - Select
 to prepare the export PDF.
 - Select Download and identify where to place the exported notes PDF.
Any colored highlights show in the notes.
You can work with notes from your eTextbook in a web browser or in the Pearson+ app  .
.