Add a classroom seat map
Updated 07 Jan 2026
Classroom seat maps are an online visual representation of an actual classroom. Only one person at your institution needs to create a classroom seat map.
When you select a seat map, you see a list of all the mapped classrooms at your institution. If the room you're using is already there, simply select it.
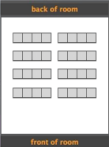
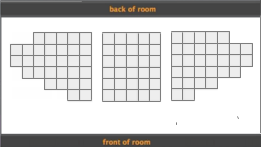
Using a classroom seat map has many advantages:
-
In an Instructor-Led Synchronous or Self-Paced session, either classroom-based or online, you see responses as soon as they are submitted. If a question has correct and incorrect answers, the seats turn green and red accordingly.
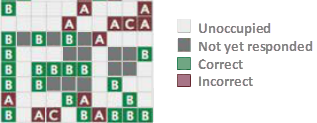
- You can point to any seat to see who's sitting there and how they answered.
- In the classroom, you can associate the name with the student's face.
- In online and asynchronous sessions, you can select Show seat map of responses to see students' responses.
- For Instructor-Led Synchronous sessions, both classroom-based and online, you can use seating proximity as a criterion for creating temporary groups.
You can use a seat map added by someone else, and you can associate a seat map with an unlimited number of Learning Catalytics courses.
If you associate your Learning Catalytics course with a seat map, students see the seat map on their devices when they join a session, and they are asked to tap or click the seat they are occupying for that session. (They don't need to sit in the same seat for every session.)
Be sure to observe the back of room (top) and front of room (bottom) orientation when you create the seat map, and include space for aisles in the classroom so classroom-based students can easily locate their seats in the seat map.


If seats are numbered in the physical classroom, you can add those numbers to ensure that students identify their seats accurately.
-
At the top of the instructor console, click Classrooms.

- Click Create classroom.
- Enter a Name for the classroom. Typically a good choice for a physical classroom is the actual building name and room number.
-
Click Next step.
Tips:
-
The back of the room is at the top of the map.

- When you start building the seat map, begin with the left side of the room at the rear.
- Even for online sessions, create adjacent seats to enable automatic grouping for peer-to-peer discussions. Click ? Instructions to read more and see examples.
-
-
To add a seat, click + Add seat.
- For a row of seats, click + Add seat repeatedly.
- For a new row, click and drag a seat to a new position, and then click + Add seat as many times as you need for that row.
-
To add a block of seats, specify the block dimensions, and then click + Add block.
- While the block is still highlighted, you can drag it to position it.
- For another block, click off of any highlighted seat or block, and then click + Add block. Initially this block is attached to a previous seat or block, but while it is still highlighted you can drag it to a different position.
- Click Save before you leave this page.
To move one seat, click and drag the seat to a new position.
To move a group of seats:
-
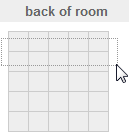
Click an unused area of the edit space and drag across the seats to be moved.
Notes:
- At the back and left borders of the edit space, click a bit away from the edge.
- An invisible white border surrounds the edit space at the back and left sides of the edit space. Click a bit away from the edge to lasso the blocks.
- Release the mouse and see that the selected seats are highlighted.
-
Click anywhere in the highlighted group and drag the whole group to a new position.

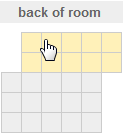
- Click the seat you want to remove, and note that it turns red.
-
Click Remove above the editing space.
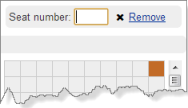
To help students identify their seat numbers in a large classroom with numbered seats, you can include those numbers in the seat map.
- Click to select a seat and note that it turns red.
-
In the Seat number box that appears above the editing space, enter an alphanumeric identifier that students will see on the seat itself.

-
At the top of the instructor console, click Courses, and then select the course.

-
From the My Courses list, click the course name to open it, and then click
 Settings. Or, without opening the course, click its gear icon
  and then select
  Settings from the menu.
- In the Classroom drop-down list, select the name of a classroom you created.
- Click Save.
Important: Be careful not to delete a seat map that someone else might be using!
If you want to delete an experimental or trial seat map, follow these steps:
-
At the top of the instructor console, click Classrooms.
- Next to the name of the classroom you want to delete, click its gear icon
 and then click Delete classroom.