Adding multiple media files with a playlist
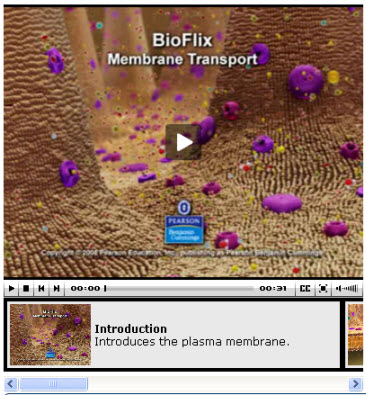
A playlist is an XML file for defining multiple media files that play sequentially. You capture and annotate thumbnail images for each segment in the playlist, which students can see. You can position playlists that vertically list segments above, below, or to the right of the display.
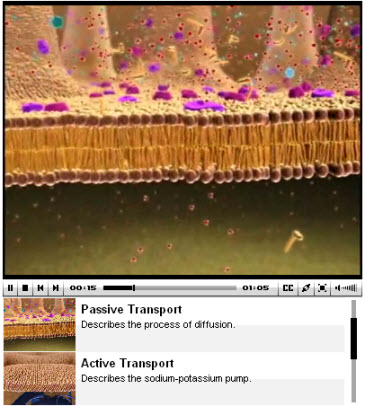
The carousel format shows segments horizontally below the display.
Creating playlist components
- Determine the media files to include and the play sequence (first, second, etc.).
- For each media file, capture a .jpg image of the first frame.
Students see this frame as a thumbnail reference for the file.
- Determine a meaningful title and brief annotation for each file.
Students see this information to the right of the thumbnail.
- Create the playlist file, which includes the names or paths to all media files and .jpg thumbnails, title text, and annotation text.
For files you’ll upload as assets, just include the file name. For files you’ll copy to a remote server, include the complete path.
- Upload or copy the following files:
- The .xml playlist file (you must upload with the Asset Manager)
- One .jpg for each media file in the playlist (you can upload if less than 1 MB, or copy to a remote server)
- Each media file in the playlist (you can upload if less than 1 MB, or copy to a remote server)
- In the Item Editor, right-click and select Insert > media where you want the player to appear.
- Click add playList, and enter the name of the .xml playlist file you uploaded.
- Enter the total Height and Width (in pixels) of the player, including the playlist thumbnails and descriptions.
- Choose where you want the playlist to display by selecting the playList style attribute:
- bottom – Segments are listed vertically, below the display
- carousel – Segments are listed horizontally, below the display
- none – Segments aren’t listed; Pearson doesn’t recommend this option
- over – Segments are listed vertically, above the display
- right – Segments are listed vertically, to the right of the display
- [Optional] Add text that appears outside the player (see text on the right in the Student view) by adding a <p> tag and text after the media table.
You can then use the float attribute to position the text. See Media tag attributes for details.
- [Optional] Set any media tag attributes you want to use.
For instance, to add an image that displays while audio is playing, enter the file name (if uploaded) or URL for the image attribute.
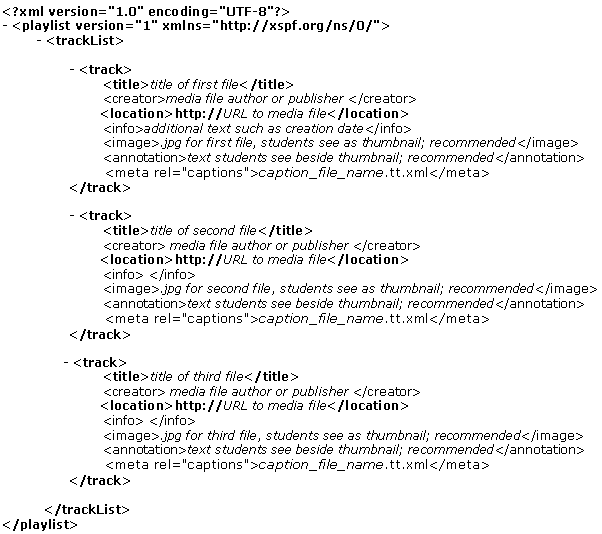
Sample playlist file
Playlists are in .xml format, which is similar to .htm format. Here’s a sample, with required tags in bold and explanatory text in italics: