Open and navigate the Pearson eText
Updated 06 Jul 2021
Having your text available in digital format can help you study more flexibly. See Study with your eText for instructions about highlights, notes, study activities, and other eText features.
When an eText is available in your course, your access to it lasts through the end of the course.
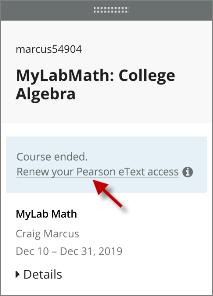
You may be able to extend your eText access before or after the course ends. This access is to the eText only, not the course. This renewal feature is not available from an LMS course, such as Canvas or Blackboard.
- Sign in to Pearson MyLab and Mastering to open the My Courses page.
- Select Renew your Pearson eText access from the course tile. If the course has ended, select Inactive to view past courses.
Don’t see the option to renew eText access? Check back later. The option should appear by the start of the next term.
- Complete the transaction.
The eText is screen reader accessible, although some content may be inaccessible.
- For more information, open the eText, select
 (top right), About, and then Accessibility.
 -
An
 Audio Player option is available in some eTexts.
The Pearson eText app is for smartphones and tablets. After you download your book from the app over the Internet, the eText is available on your mobile device—even when WiFi is unavailable.
- Select Pearson eText in the course menu.
If you don’t see this option, an eText may not be enabled for your course.
- Choose the link or button on the content page, whether View, Access the eText, or other.
The eText opens in its own browser window or tab. For navigation tips, see the next section.
If you encounter any issues opening the eText, contact Pearson Support.
When you first sign in, the eText opens with its Contents. When you sign in again later, the eText opens to your last view, like for a book page.
Your instructor can modify the table of contents to more closely follow your course. For example, some chapters may appear out of book sequence or under “Optional materials” at the end of the Contents. (Does not apply to PDF eTexts.)
- Select
 (top left) then
  , if the Contents is not already active.
 - To show the Contents at maximum width, select
 .
. - Select a chapter or section name to open it. To view sections within a chapter, select
 .
.The Contents pane closes so you can see the book content at full width.
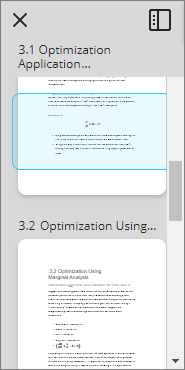
Quick View lets you scan surrounding pages in a chapter, while keeping track of your current location. It can help you quickly refer back to some material or to scan ahead, like flipping through print book pages.
The Quick View feature is available for select titles only. When available, the Quick View control appears in the lower left of a book page. 
- Select
 from a book location to open Quick View on the left.
Each chapter section appears as a single object in Quick View. The blue highlight indicates your current location in the book.
- Select another section to open it for scrolling. To investigate something, like to play audio or video, select the content.
- Select
 to widen or narrow Quick View.
 - Select
 to close Quick View and return to your original content.
- Select then
 .
. - Select a location under “Recently visited” or select a bookmark. If you’ve added bookmarks, these are listed below any “Recently visited” locations.
- Recently visited — Shows up to 3 eText locations you visited within the same session.
Bookmarks — Appear in chapter order with the
 option.
Search by page number — Enter the page number in the  Search box, such as page 32. You may need to choose from several result matches, like Page 32 and Page 320.
Enter page number (PDF eTexts only) — If the current page number appears at the top of the page, you can also enter a different page number to switch to that print page. 
- In some eTexts, select the previous or next arrow at the top of the page. (Applies to PDF eTexts.)
- In other eTexts, the print book page number appears in the left margin as you scroll. (Selecting the previous or next arrows along the sides takes you to the previous or next chapter section.)
Select a figure/table, audio/video, glossary term, or other link to open or play it from your current context.

Search your eText, adjust its display, and open the Contents, History, Notebook, and Study Guide.
- Select and enter your search term or phrase. Search results will include content and glossary terms. In some eTexts, results may also include images, videos, math and chemical equations, highlighted text, notes, and note tags.
Phrase searches — When searching on multiple words like atomic number, exact match results appear first followed by any matches to the individual terms, like atomic and number.
Filter your search by content type — After you enter a search term in some eTexts, you can also filter the results to show matches of a particular content type only. You can filter by chapters, figures, glossary, content, notes and note tags, or videos.

- Select a search result to jump to that content in the eText, whether a glossary definition, content snippet, or other. In some eTexts, you can play videos from the results area. You can also clear your search history (not available in PDF eTexts).
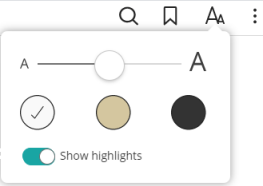
Select  from the top toolbar to adjust font size, color contrast, or show/hide highlights. The color contrast option is not available for PDF eTexts.
Open features from the menu — Select then either Contents, History, Notebook, or Study to open the feature in a drawer on the left. To expand your view of any of these options, select .
Close the feature drawer — Select from the book page toolbar to return to the current book page.
Select then Contact Support.
Select (top right) then Get loose leaf. You may also be able to buy a loose-leaf printed text from the page you see when you select eText from your course menu. Not all books provide the loose leaf option.