Set up Access Pearson - Sakai
To set up the integration:
- Add the link to open Pearson content, if you don't see it.
- Add or copy Revel or eText content to your course.
- Add assignment links, if available.
- Get students started.
- Sync grades.
Not sure which integration you're using? This topic covers the Access Pearson (LTI 1.3) integration. Check the Launch Type in Diagnostics or contact your LMS administrator if you're unsure which integration was set up for you. The Launch Type for the Access Pearson integration is Standard integration LTI 1.3.
 Watch a video of these instructions
Step 1: Add the link to open Pearson content
Sakai only works with the Access Pearson integration. You can add the Access Pearson tool if you have the right permissions. If not, check with your Sakai system administrator.
-
Log in to Sakai as an instructor and open your course.
-
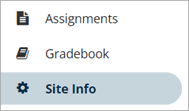
Select Site Info in the left navigation.
-
Choose the Manage Tools tab.

-
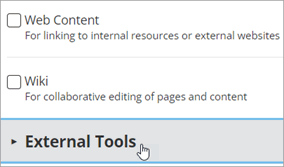
Scroll down and expand the External Tools section.
-
Select the Access Pearson tool.

Don't see this option? Check with your system administrator.
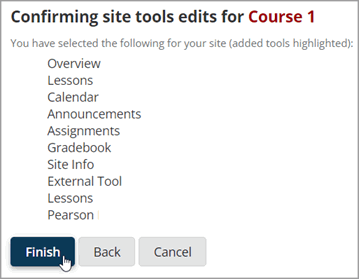
- Select Continue.

- Select Finish to confirm.
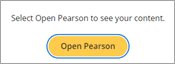
- Select Access Pearson in the left navigation.

-
Select Open Pearson.
Next, add or copy Revel or eText content to your Sakai course.
Step 2: Add or copy Revel or eText content to your course
To access Revel or eText content from your LMS course, link your accounts once and add or copy content to your LMS course. Then set up Revel or eText assignments.
Link your accounts
- From your LMS course, select the Revel and eText or Access Pearson link. Don't see the link?
- Select Open Pearson.

 See another page telling you how to re-open your content?
If the Pearson Home page isn't already open in another tab, return to your LMS course navigation and select the link to access Pearson.

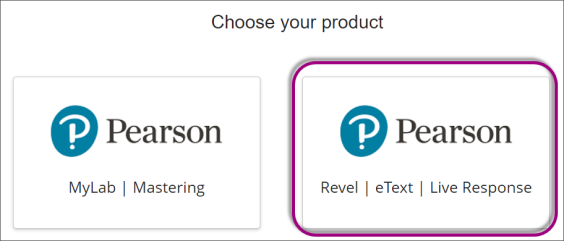
- Select Revel | eText. Your selection is permanent and can't be undone.
- Agree to any authorization requests.
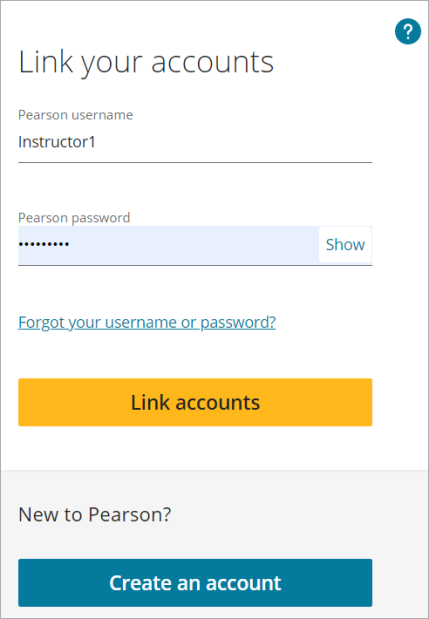
- If prompted, enter the username and password from your existing Pearson instructor account and select Link accounts. If you don't have an account, select Create an account and follow the prompts. You can only link one LMS account to one Pearson account.
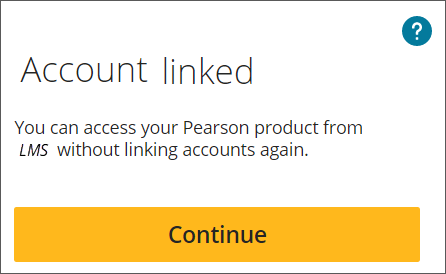
- Select Continue.
Next, add or copy Revel or eText content to your LMS course.
Section instructors: Multiple instructors can use the same Pearson content in an LMS course. The first instructor adds Pearson content to an LMS course and enrolls any other instructors. Other instructors open the Pearson content and, if applicable, link a Pearson account with an LMS instructor account. An access code or other payment isn't required. No changes need to be made to designate the other instructor within Pearson.
Teaching assistants: Some LMSs don't support the teaching assistant role. To retain their privileges, TAs should access a Revel course through My courses instead of the LMS course.
Close the browser window or tab. A message says your Pearson account isn't linked. Go back to your LMS course and open Pearson.
Add or copy Revel or eText content to your course
From your LMS, add or copy Revel or eText content to your course. You can't do this for Revel or eText content you created outside your LMS course such as from the Revel website. However, you can add copies of this content.
- Confirm there are no unsupported characters in the section title, names, and settings of your LMS course: \ / " * < > + = | , % ! & : ? -. Names can't exceed 128 characters.
- From your LMS course, select the Revel and eText or Access Pearson link. Don't see the link?
- Choose any available option to add or copy Revel or eText content.Learn about options
- Find new content to add. Enter the author, ISBN, title, or keyword and select
 .
.
To verify the content, check the title, author name, or ISBN. Read the overview and table of contents. Payment options are under Student access options.
Revel Seamless: After you find and select content, you'll see options to copy another instructor's content or, if applicable, content you've used previously. You can't add or copy content you created outside your LMS course such as from the MyLab and Mastering or Revel website. However, you can add copies of this content. Also, students pay for Revel Seamless content through their institutions. Look for Institutional access with the number of days students can access the content.
- Add new or copied content by selecting Set it up.

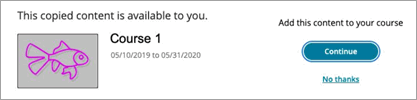
- If your LMS course was copied from a course with Revel or eText content, select Continue to copy it.
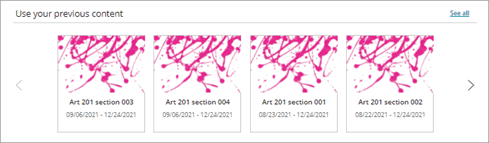
- Copy content you used in the past under Use your previous content.
- Copy another instructor’s content. Enter the copy code provided to you and select Find.

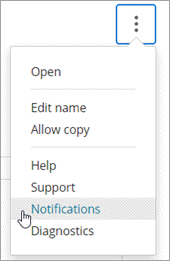
Prompted to upgrade?After copying your content, select Notifications from the Options menu for a report on upgrade results.
You'll see the report under Notifications. Select
 to return to your grade sync settings.
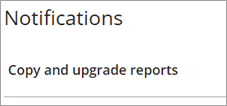
- Find new content to add. Enter the author, ISBN, title, or keyword and select
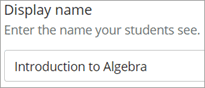
- Use the default or enter a display name between 4 and 40 characters long.
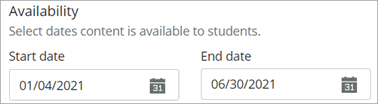
- Select the availability start and end dates.
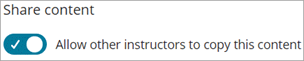
- Under Share content, choose whether to let other instructors copy your content using a code.
- Select Continue and wait for the confirmation message.
 Using Blackboard? Submit the Pearson link.
Select Return to Course.

You'll see a confirmation message and then might need to return to Blackboard and select Revel and eText or Access Pearson again.
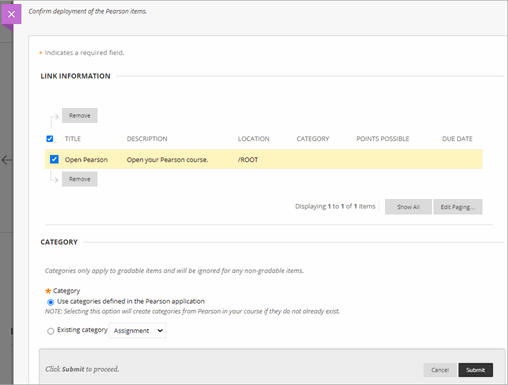
For the Revel and eText integration, select Submit to add the link to the destination folder. For the Access Pearson integration, enter a link name. We recommend Access Pearson.
 or
or 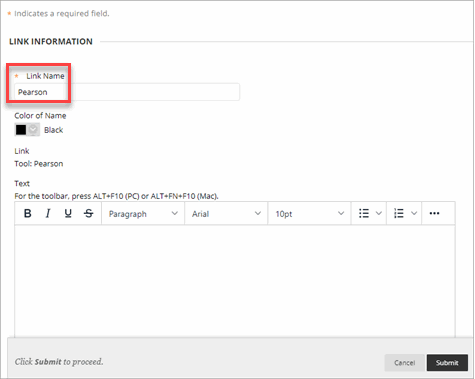
Make your course available to students.
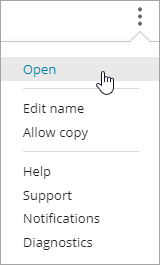
- Select the content image or Open from the Options menu to open your Pearson content.
Next, set up assignments.
Set up assignments
- From your LMS course, select the Revel and eText or Access Pearson link. Don't see the link?
- Create and publish assignments with due dates. Manage due dates only from your Revel and eText content, not your LMS course. See Revel Help for how to create assignments, assign due dates, and publish.
Make sure assignment names don't exceed 128 characters. Avoid unsupported characters in names and settings: \ / " * < > + = | , % ! & : ? -
- Return to your LMS course.
Next, depending on your integration, do one of the following:
- If you're using the Revel and eText (LTI 1.1) integration, get students started.
- If you're using the Access Pearson integration, you can add assignment or course tool links before you get students started.
Learn more
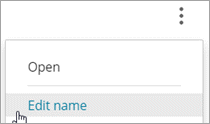
You can edit the display name or availability dates after you add or copy content. Select Edit name from the Options menu.
For LMS courses that use the same Revel or eText content, copy the same Revel or eText content. Alternatively, create and copy an LMS template course with the same Revel or eText content.
If you use the Revel and eText or Access Pearson integration with seamless access and use multiple learning management systems, add new content instead of previous content. Don't copy Revel or eText content from one learning management system. Seamless access doesn't transfer.
Next, add assignment links, if available.
Step 3: Add assignment links, if available
If you're using the Access Pearson or Access Pearson Codeless integration (LTI 1.3), you can add links that go directly to specific Revel or eText assignments or course tools, such as Grades, from your LMS course. These links aren't available for the Revel and eText integration (LTI 1.1). Don't know your integration?
Prerequisites: First add Revel or eText content to your LMS course and set up assignments in your Revel or eText content.
To add assignment links to Sakai:
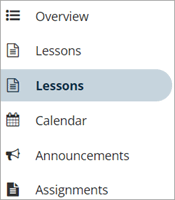
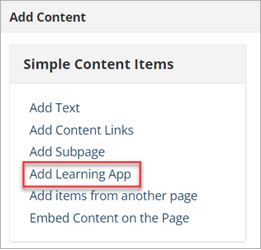
- From your Sakai course, select Lessons in the left navigation.
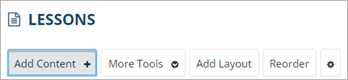
- Select the Add content tab.
- Under Simple Content Items, select Add Learning app.
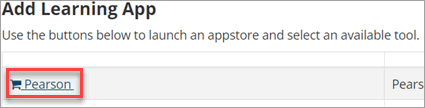
- Choose the Pearson app.
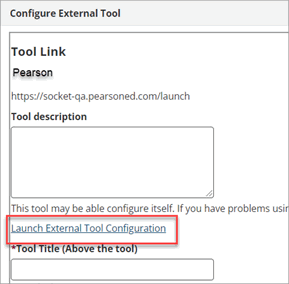
- Select Launch External Tool Configuration.
-
From the Add links from list, choose whether to see assignments or course tools. Then scroll to see all the links or search for a specific link. Choose a column heading to sort.
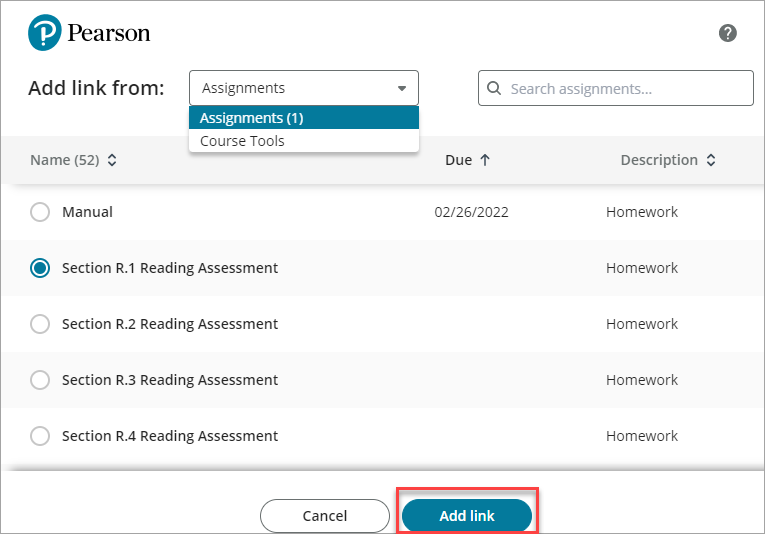
If you select Cancel and there are no links to add, you'll see an "Alert: Error in Deep Link Response (A deep link response must include at least one content_item)" message. Select X to close the message.
- Select one link. If you then select a different link, the previous link is automatically deselected.
- Select Add link. You might need to scroll down to see the button.

You'll see the link you just added.

To add more assignment or course tool links, repeat the previous steps.
Next, get students started.
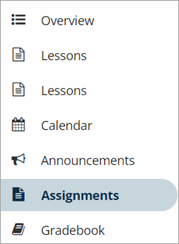
- From your Sakai course, select Assignments in the left navigation.
- Select the Add tab and then the Insert Content Item
 icon. (Or select Edit next to an existing assignment.)
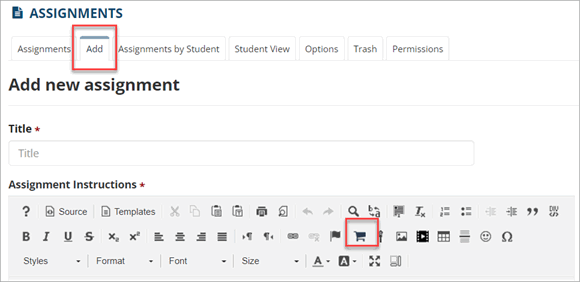
- Select Pearson. You might need to wait a moment to see the Add Links page.
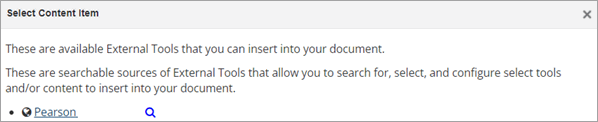
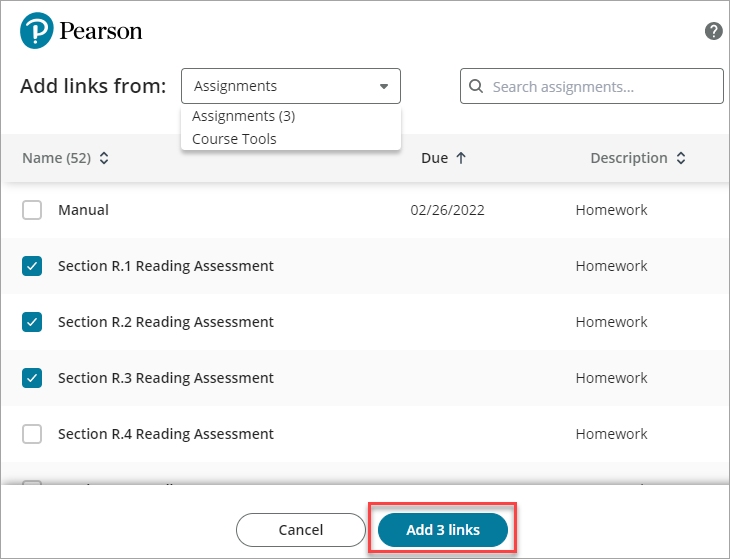
- From the Add links from list, choose whether to see assignments or course tools. Then scroll to see all the links or search for a specific link. Choose a column heading to sort.
If you there are no links to add and you select Cancel, you'll see an "Alert: Error in Deep Link Response (A deep link response must include at least one content_item)" message. Select X to close the message.
- Select one link. If you then select a different link, the previous link is automatically deselected.
- Select Add links. The button shows the number of links you selected. You might need to scroll down to see the button.

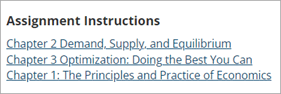
You'll see the links under Assignment Instructions on the Add new assignment page.
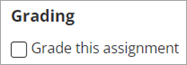
- Clear the Grade this assignment check box and complete the remaining fields.
- Select Post.

- Select the new assignment to see the links under Assignment Instructions.
Next, get students started.
External Tool Import error: If you try to add assignment or course tool links via More Tools > External Tool Import, you'll get an "Alert: Missing file item in deep link response" error after you select a link. We don't recommend this method.
Next, get students started.
Step 4: Get students started
It’s simple for your students to open Pearson content or download diagnostics. Here's what to be aware of regarding student access:
- Payment options: Students link accounts and might need to pay for access. Payment options may include pre-purchased access code, credit card, or PayPal. Temporary access without payment is available for a limited time for some content but isn't supported for Access Pearson Codeless integrations.
- Course invites: You don't need to give students course invites.
- Blackboard Original: For the status of student registrations, check the roster.
- Grade sync: At least one student must start an assignment to sync grades for assignments.
Student registration instructions
Check out these resources and share them with your students:
Next, sync grades.
Step 5: Sync grades
After students get started, sync the overall score or grades for published assignments for all students. This happens one-way from Revel to your LMS course. (Grade sync doesn't apply to eText.)
To prepare for grade sync, open Revel from your LMS course and choose sync settings. Then return to your LMS course and choose sync settings from the Pearson Home page.
Watch a video of these instructions
Prepare for grade sync from your Revel content
- From your LMS course, select the Revel and eText or Access Pearson link. For Barnes & Noble, Follett-Willo, RedShelf, or VitalSource, select the Course Materials, Access Courseware, or Launch Courseware link. Don't see the link?
- Open your Revel content from the Pearson Home page.
- Next, choose any settings for scores, assignments, and assessments in your Revel content. See Revel Instructor Help for instructions.
Set up grade sync from your LMS course
- From your LMS course, select the Revel and eText or Access Pearson link. For Barnes & Noble, Follett-Willo, RedShelf, or VitalSource, select the Course Materials, Access Courseware, or Launch Courseware link. Don't see the link?
- Select an available Sync type on the Pearson Home page.
 Overall score
Sync an overall (total) score column over 100 points possible for each student in the LMS gradebook. (Overall score is the only Sync type available for Revel content with assignment weighting and the Revel and eText integration for Moodle.)
If you switch the Sync type from Assignments to Overall score, the overall score replaces any assignment grades in the LMS gradebook. You might need to select Sync now tor resolve any grade sync issues after switching the sync type.
AssignmentsSync grades for published assignments. (The Assignments option for Sync type isn't available for some Pearson products and integrations, including the Revel and eText integration for Moodle.)
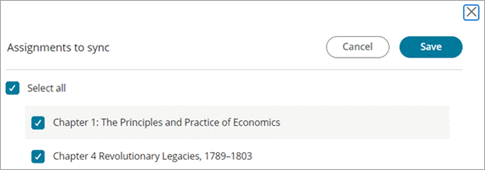
At least one student must start an assignment to sync grades. All assignments are selected by default. Select View to choose only the assignments with grades you want to sync. Then save your changes. You might need to set up the assignments with their own due dates in your Revel content. Pearson grades for assignments are sent to your LMS as raw points and can't sync as percentages. You can change grades to percentages from your LMS gradebook.
- For Sync method, choose whether to automatically sync the overall score or grades for selected assignments.

Manual sync
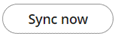
Manually sync all overall scores or existing grades anytime using Sync now. We recommend you do a manual sync to make your LMS gradebook current or when you're creating grade reports. A manual sync may resolve grade sync issues after deleting assignments from your LMS course or switching the sync type between overall score and assignments.
You can do a manual sync after you select a sync type and, if applicable, specific assignments to sync. A manual sync usually takes around 5 to 15 minutes. After the confirmation message, updates are immediately available in your LMS gradebook. Any edits you make to Revel grades and column names in the LMS gradebook might be overwritten to match grades from Revel. To fix this, make your changes to the Revel gradebook and then do a manual sync.
To see the most recent syncs using Sync now, select  next to Grade sync settings. For example:

Grade sync FAQs
You'll usually see grades from a manual sync immediately after the confirmation message. Grades automatically sync as they become available. If a student just opened or completed an assignment and immediately looks at the LMS gradebook, those columns might have a zero or not match until the next sync. Zeroes sync immediately when an assignment is overdue. If the due date is extended, zeroes still sync to the LMS gradebook. When a student completes work for an assignment with a zero grade, the zero is updated in the next grade sync.
For automatic grade sync, make sure the sync type, any assignments, and sync method are set. Assignments must be published.
Select Sync now to manually sync grades. This often resolves grade sync issues. If not, check troubleshooting.
Next to the Assignments option, select View to choose only the assignments with grades you want to sync. You might need to set up the assignments with their own due dates in your Revel content.