Video: Create an assignment and set basic properties
Instructors and section instructors with the
Video: Create an assignment and set basic properties
 If you are planning to add an Adaptive Follow-Up assignment to a Standard (Parent) assignment, keep in mind the Tips for using Adaptive Follow-Ups.
 Create Assignment.
After you have followed one of the procedures listed above, the steps to define or edit an assignment are grouped on five pages for you to complete. To move from page to page, you can click a page number  or name at the top of the page, or click Continue at the bottom of a page. To see a list of all assignments, click the Assignments tab.

The expandable sections below provide an overview. To see details, click links within the sections.
If you plan to add an Adaptive Follow-Up to this assignment, see Tips for using Adaptive Follow-Ups for best practices for creating a Parent assignment.
Enter the Assignment Title, which you and students will see in the Assignments list
 Preview and Assign.
Select an available Category, or create a new ![]() category.
category.
The assignable items on this page are from the course's Item Library, and are designed specifically for the textbook or other source that is selected for the course.
Important: If you are editing an assignment that is already available to students, be aware that removing any item deletes any student work on that item. Removal happens as soon as you click the item check box. Even if you click again to reinstate the item, student work is lost.
Filter the list of assignable items by selecting from the drop-down lists and check boxes near the top of the page.
The filter options depend on the textbook or other resource used for the course.
Advanced: You can also click Create New Item or Import Items to add your own items to the Item Library.
[Optional] Sort the list of filtered items by clicking a column header.

|
An arrow indicates the current sort column. To reverse the sort on the same column (switch between ascending and descending), click that heading again. |
Add items to the assignment by clicking the check box next to an item or next to a grouping name (to select all items in that grouping). You can also select all items in the filtered list by clicking the check box in the Assign column header.
Or preview an item by clicking its title, and then assign the item by clicking Assign Item at the bottom of the preview window. From there you can click Next Item and Previous Item to preview and assign additional items.
Notes:
 information icon next to an item means that the item is in another assignment in the same course. Click the icon to see details.
At the bottom of the Organize Content page, you can see the total of the median times and the average of difficulty levels of all the content items you selected for the assignment. Based on this information you can remove items or adjust point values for individual items. ![]() Exception:
Exception:
You can also organize your content in other ways. For example, you can:
Depending on the textbook for the course, assignment items might already be associated with ![]() learning outcomes.
learning outcomes.
If you are satisfied with the provided outcomes, or if you don't plan to use learning outcomes, you can click Skip this step. Otherwise, you can:
Add/Edit My Learning Outcomes. in the item row.
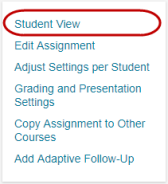
[Optional] See the assignment as students will see it by clicking the preview the assignment in the student view link. This is the same view you see by clicking Student View on the assignment page. ![]() View an image
View an image
To make the assignment visible to students on their Assignments list
Tip: You can postpone this step and set the due dates and availability for several assignments at once. See Edit due dates and availability for multiple assignments.
[Optional] If available, click Yes to add an Adaptive Follow-Up for this Parent assignment. ![]() View an image
View an image
Copy an assignment to other courses
Make an assignment available to students
Video: View assignment (view as a student, print answers, view summary data)