Options for different question types
Updated 07 Jan 2026
If you create or edit a question for Learning Catalytics, most of the information you enter is standard across all types of questions. Options information, however, varies by question type.
Question options
On the Add Questions and Customize Module page, you also set other options specific to each response type. When you are done, be sure to click Save and Finish.
- Hide sessions for this module from students, used primarily for quizzes. When you select this option, any active sessions for the module aren't visible to students when they open Learning Catalytics. Instead, students must enter the Session ID that you reveal to all students in the class simultaneously. That way you can ensure that everyone starts the sessions at the same time.
-
Do not allow students to review their performance on this module. If checked, students do not see sessions for this module in the list of older sessions that they can review.
(You also set the Allow review after delay period in the Learning Catalytics course settings. Until the specified period has elapsed, questions and answers for any delivered module are not available for review.)
- Start times. Click in the field to display the date/time calendar where you can select a date and time for automatically starting a session. Or leave blank if you want to start the session manually.
To give students a number of options for when to participate in a session, click + Add start time and repeat the previous step. Students get to choose which session to join.
Be careful not to schedule the sessions too close together. A session is automatically terminated when another session begins, so allow plenty of time between sessions to avoid ending any automatically paced session prematurely.
When you add multiple start times, the Learning Catalytics Gradebook creates a column for each one. For example, if you create three start times, there will be three columns in the Learning Catalytics Gradebook. A student's score is in the column for the session in which the student completed the module; the other columns display 0 (zero) for the student's score. If you plan to download the scores, you may want to edit the .csv file to remove the zero scores. If you transfer the scores to a Mastering or MyLab course, the transfer will add three columns for this module to the MyLab and Mastering Gradebook.
- Hide sessions for this module from students, used primarily for quizzes in instructor-led sessions. When you select this option, any active sessions for the module aren't visible to students when they open Learning Catalytics. Instead, students must enter the Session ID that you reveal to all students in the class simultaneously. That way you can ensure that everyone starts the session at the same time.
- Start first question after. Accept the default (5 minutes), or change the length of the time allowed to let students join the session.
- Present correct answer for. Accept the default (1 minute), or change the length of time each correct answer and explanation are displayed before the next question is displayed.
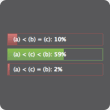
- Lower bound for grouping and Upper bound for grouping establish the percentage range of correct answers for each question that will trigger automatic peer grouping. The default values of 30 and 70 are can be edited, but are generally suitable because:
- If less than 30% of responses are correct, students might not be able to learn more in peer discussion because misunderstanding is too widespread.
- If more than 70% of responses are correct, the material is understood by enough students to move on to the next question. Remediation can occur later through other means.
Tip: If grouping doesn't occur, it's particularly important for each question to have an explanation of the answer. Students see the correct answer and explanation at the end of each question.
-
Start at. Click in the field to display the date/time calendar where you can select a date and time to automatically start the session. Or leave blank if you want to start the session manually. For an in-class quiz, this would be the time when the questions become available to all students to begin work.
Next to this field you can also click Change my time zone to check or change the time zone associated with your Learning Catalytics account.
More about the time zone
Initially this time zone is the same as the time zone of the connected Mastering course. If you change that time zone in Mastering Course Settings, you can use this setting to update the time zone in Learning Catalytics to match.
-
End at. Click in the field to display the date/time calendar where you can select a date and time to automatically end the session up to two years in the future. Or leave blank if you want to terminate the session manually.
If you leave this value blank, the session is automatically terminated after 28 days. If you want the session to remain open for more than 28 days, you must specify an End date/time. Note that until a session ends, scores are not sent to the Learning Catalytics Gradebook, and students cannot review the session for study.)
For an in-class quiz, this would be the time when the questions are no longer available to students. Thus, the Start at and End at values can serve as a start and stop timer for all students at once. Outside of class, these values should span a longer, more flexible period (1 or more days, perhaps) during which students can work at a time that suits them, but must finish by a deadline. This deadline isn't visible to students, so you should tell them about it.
Both in class and outside of class, students can access and change their responses at any time up until the session is stopped—either manually, when you click the Stop Session button, or automatically, based on the End at value or 28 days after the session starts.
- Students should be asked to select a seat when logging in. Clear this check box if you plan for students to complete this assignment outside of the classroom.
- Hide sessions for this module from students, used primarily for quizzes. When you select this option, any active sessions for the module aren't visible to students when they open Learning Catalytics. Instead, students must enter the Session ID that you reveal to all students in the class simultaneously. That way you can ensure that everyone starts the sessions at the same time.
-
Do not allow students to review their performance on this module. If checked, students do not see sessions for this module in the list of older sessions that they can review.
(You also set the Allow review after delay period in the Learning Catalytics course settings. Until the specified period has elapsed, questions and answers for any delivered module are not available for review.)
-
Start at. Click in the field to display the date/time calendar where you can select a date and time to automatically start the session. Or leave blank if you want to start the session manually. For an in-class worksheet, this would be the time when the questions become available to all students to begin work.
Next to this field you can also click Change my time zone to check or change the time zone associated with your Learning Catalytics account.
More about the time zone
Initially this time zone is the same as the time zone of the connected Mastering course. If you change that time zone in Mastering Course Settings, you can use this setting to update the time zone in Learning Catalytics to match.
-
End at. Click in the field to display the date/time calendar where you can select a date and time to automatically end the session up to two years in the future. Or leave blank if you want to terminate the session manually.
(If you leave this value blank, the session is automatically terminated after 28 days. If you want the session to remain open for more than 28 days, you must specify an End date/time. Note that until a session ends, scores are not sent to the Learning Catalytics Gradebook, nor optionally transferred to any Pearson course gradebook, and students cannot review the session for study.)
For an in-class worksheet, this would be the time when the questions are no longer available to students. Thus, the Start at and End at values can serve as a start and stop timer for all students at once. Outside of class, these values should span a longer, more flexible period (1 or more days, perhaps) during which students can work at a time that suits them, but must finish by a deadline. This deadline isn't visible to students, so you should tell them about it.
Both in class and outside of class, students can access and change their responses at any time up until the session is stopped—either manually, when you click the Stop Session button, or automatically, based on the End at value or 28 days after the session starts.
- Allow students to respond to each question multiple times. If selected, students will be allowed to answer each question as many times as they wish. Students will not receive feedback, and only the last response before the session ends will be recorded.
-
Do not allow students to review their performance on this module. If checked, students do not see sessions for this module in the list of older sessions that they can review.
(You also set the Allow review after delay period in the Learning Catalytics course settings. Until the specified period has elapsed, questions and answers for any delivered module are not available for review.)
- Team assignment. Select whether to use the permanent teams from the course or let students assign themselves to new teams.
- Points. Specify the number of team rounds and the number of points a correct answer is worth in each team round.
- Weighting. Use the slider to determine the proportional scores for individual vs. team work in the module.
- Hide sessions for this module from students. When you select this option, any active sessions for the module aren't visible to students when they open Learning Catalytics. Instead, students must enter the Session ID that you reveal to all students in the class simultaneously. That way you can ensure that everyone starts the sessions at the same time.
-
Do not allow students to review their performance on this module. If checked, students do not see sessions for this module in the list of older sessions that they can review.
(You also set the Allow review after delay period in the Learning Catalytics course settings. Until the specified period has elapsed, questions and answers for any delivered module are not available for review.)
Descriptions of Options
The following table lists each question type and provides descriptions of its options. For some question types, it is ![]() possible to set up the question for automatic scoring. Other question types are either
possible to set up the question for automatic scoring. Other question types are either ![]() always or
always or ![]() never automatically scored.
never automatically scored.
Click each question type below to see its details, or click ![]() above the side menu (if visible) to expand or collapse all details at once.
above the side menu (if visible) to expand or collapse all details at once.
|
Question type & automatic scoring |
Options (when you create or edit) |
|---|---|
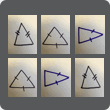
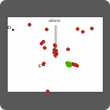
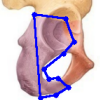
| Composite sketch
|
Show options
|
| Confidence
|
Show options
|
| Data collection
|
Show options
|
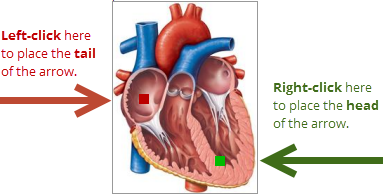
| Direction
|
Show options
|
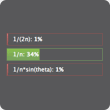
| Expression
|
Show options
|
| Highlighting
|
Show options
|
| Image upload
|
|
| Long answer
|
|
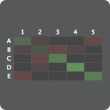
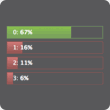
| Many choice
|
Show options
|
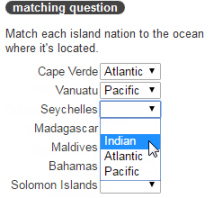
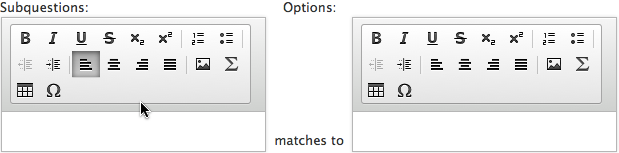
| Matching
|
Show options
|
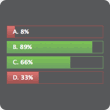
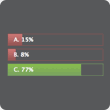
| Multiple choice
|
Show options
|
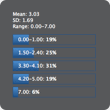
| Numerical
|
Show options
|
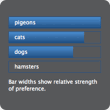
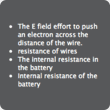
| Priority
|
Show options
|
| Ranking
|
Show options
|
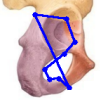
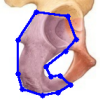
| Region
|
Show options>
|
| Short answer
|
Show options
|
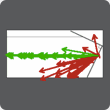
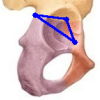
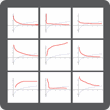
| Sketch
|
Show options
|
| Slide
|
|
| Word cloud
|
|


Click here to read the topic about creating or editing a question for Learning Catalytics.