Review prebuilt course materials
After creating a prebuilt course, you need to do the following:
- Review the syllabus.
- Make the assignments available to your students.
- Review any required Resources and resulting study plans.
Tip: Once you review and, optionally, customize your prebuilt course, you can copy it to make other courses, and you can create courses that are linked to it. See Create, copy, or link to a course for more information.
1. Review the syllabus
The syllabus is a Microsoft® Word document that provides an explanation of the prebuilt materials, a link to the instructor's manual, and a suggested course syllabus. Because this document is included as a syllabus, your students have access to it. After reviewing this document, you can edit it or remove it from the course.
 To open and/or download the syllabus
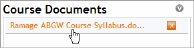
- Click the topmost document under Course Documents on the Home page.
- Select to open or download/save the syllabus document.
To upload a revised syllabus
- Click the Post Syllabus button under Course Documents on the Home page.
- (Optional) Click the review the list of file types link to display a list of supported file types.
- Click the Browse button and select the file to upload.
- (Optional) Enter a File Display Name.
The File Display Name is the name you and your students will see on the Home page. For example, you may want to enter Syllabus as the File Display Name. If you do not enter a display name, the Syllabus Manager displays the file name instead.
- Click the Upload and Post button.
The MyLab displays the link for the syllabus at the top of the Course Documents section on the Home page. You and your students can click the name of the syllabus file to open it.
Tip: Switch to student view to see how the MyLab displays the syllabus on the student Home page.
To delete the syllabus
- Click the
 to the right of the syllabus file on the Home page.
- Click OK to delete the syllabus.
2. Make assignments available to students
The syllabus gives you an overview of the assignments included in the course and a suggested time frame for each one. To use a prebuilt assignment, you need to review/edit its due dates and activate it. (Activating an assignment makes it available to your students.)
To edit prebuilt assignments
- Click the Assignments tab.
- Click View Current Assignments.
The prebuilt assignments are listed under Current Assignments, Past Assignments, and/or Assignments Requiring Additional Setup.
Current Assignments: If you selected to use the original assignment due dates when creating the course, any assignment with a due date of today or later is a Current Assignment.
Past Assignments: If you selected to use the original assignment due dates, an assignment with a due date prior to today is a Past Assignment.
Assignments Requiring Additional Setup: If you selected not to use the original assignment dates, all prebuilt assignments are initially in this list.
- Expand the assignment list you want to view. For example, click Assignments Requiring Additional Setup to view its assignment list.
- Click an assignment's title.
The assignment details are displayed.
- Click the Edit button.
The assignment opens in the Assignment Builder. You can edit any of the assignment's settings, but for prebuilt assignments you need to review and enter the assignment's dates and activate the assignment. These settings are all at the bottom of the Assignment Builder's Step 2 page.
Show me the settings.
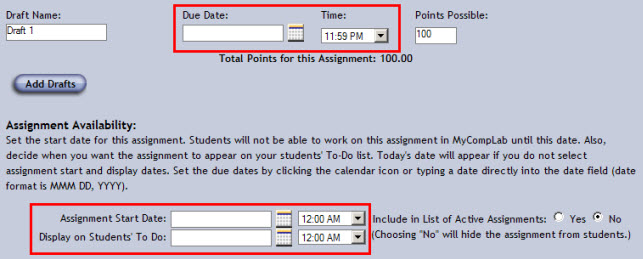
- Enter the following:
Due Date and Time Enter the assignment draft's due date and the time it is due. The due date and time also appear in assignment lists and calendars. (The course's time zone affects the cutoff time for an assignment's due date. For example, an assignment due at 11:59 p.m. in Central time will be due earlier for students on the west coast and later for students on the east coast. See Your course's time zone for further information.)
Assignment Start Date Enter the earliest date and time on which students can start work on the assignment.
Display on Students' To Do Enter the date and time on which you want the MyLab to display the assignment on students' To Do lists. You can use this date to release your assignments over time: set up all your assignments (a virtual syllabus) before the course begins, then use this setting to release assignments to students one by one.
Include in List of Active Assignments Select this option to activate the assignment, unselect the option to deactivate the assignment and hide it from students. See Activate and Deactivate Assignments for more information.
- (Optional) Edit other assignment settings as needed.
- Click the Continue button to save the assignment.
Once you activate and create dates for any Assignments Requiring Additional Setup, the MyLab moves them to the Current or Past Assignments list, depending on the due dates.
For more information on assignment types, see Assignments.
3. Review required Resources and resulting study plans
Check the prebuilt syllabus to see if the course includes any instructor-required Resources. If it does, the quickest way to view a complete list of required Resources is to:
- Switch to student view.
- Click the To Do tab.
- Expand My Study Plan.
In student view, the Study Plan lists all instructor-required Resources.
For more information, see Require Resources, Edit required Resources, and Student Study Plans.