Add and edit images
Updated 17 Sep 2025
You can use the Simple Editor to add images or to replace most images in existing items. Before you begin, check the file size of the image you want to add. Images you upload should be less than 1 MB. To add larger images, enter a server URL for each file. The number of images in a single item should be less than 200. How to add media
You can add these image formats into an item using the Simple Editor.
- .bmp — bitmap
- .gif — graphical interchange format
- .jpg — JPEG
- .png — portable network graphic
- .svg — scalable vector graphic
These image formats are supported for mobile-ready items. More about guidelines for mobile-ready items
You can add images to the following elements in an item:
- Learning Goals
- Introduction
- Part Text, Part Instruction, Part Feedback, and Part Follow-up Text
- Hint Text (informational hints and Socratic hint questions)
- Hint Instruction, Hint Feedback, and Hint Follow-up Text (Socratic question hints only)
- Transition Text
Add images
- Open the Simple Editor so that the item you want to edit appears in the Edit Item window.
- Identify the box where you want to add the image. Select
 show or
  hide, as needed.
 - In the box, position the cursor where you want to insert the image.
Images can be inserted inline, within the text. For larger images, or for images in hints, answer instructions, or follow-up text, create a paragraph for the image and place your cursor in the start of the paragraph.
The editing toolbar and menus appear for you to make your edits.
- Select
 Insert/edit image from the editing toolbar.
 - In the Insert/edit image dialog box, select
 Upload.
The Upload file(s) window opens, with a list of any previously uploaded files to help you manage your image assets. You can also open this window by selecting
 Asset Manager from the top toolbar.
To preview any image from the list —
Select its file name to view it in a pop-up window.To add an existing image from the Image Manager list to your item —
Skip to step 8. - Select Browse and navigate to the folder that contains the new image file.
When you select the image file, its name appears at the top of the Upload file(s) page.
- Select Upload.
The image file name appears in alphabetical order in the Filename list of the Image Manager.
- Choose Select for the appropriate image file name in the Filename list.
You are returned to the Insert/edit image dialog box, with the selected image file name in the Source field.
- Add an image description. Provide a clear text alternative description of the image for screen reader users (accessibility).
For best practices when creating alternative text —
Refer to these instructions about Alt text from WebAIM. (Suitable for beginners). - Choose whether the image should be centered or right justified. (Optional)
Centered
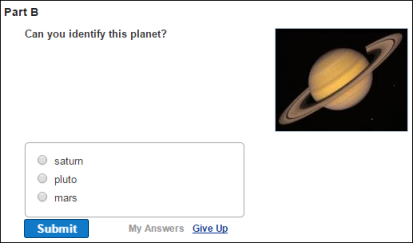
Choose this when you want an image to sit inline on the text baseline or for the image to appear left justified when the image is in its own paragraph. Publisher items you edit using the Simple Editor may have this as the default.Right justified
Choose this for the image to be right justified in Standard View. - Select OK.
Important: In the Edit Item window of the Simple Editor, the image appears where the cursor was in the box when you chose to insert an image. To see the image placement as it will appear to students, select the Save & Preview link (top right).
- Resize the image in the item. (Optional)
Select the image and then drag it by a corner to make it proportionately smaller or larger. This action does not affect the size of the original file in the Image Manager. - To save your edit, select
 Save (from the top toolbar) or the Save & Preview link. Do NOT press Ctrl+S (Windows) or Command-S (Mac OS).
- Copy the image to a remote server, making note of its name and the server path URL.
If the image location changes, be sure to update the URL to it. Otherwise it won't display in the item.
- Open the Simple Editor so that the item you want to edit appears in the Edit Item window.
-
Identify the box where you want to add the image. Select
 show or
  hide, as needed.
- In the box, position the cursor where you want to insert the image. For large images, create a paragraph and place your cursor in the start of the paragraph.
The editing toolbar and menus appear for you to make your edits.
- Select
 Insert/edit image from the toolbar.
 - In the Insert/edit image dialog box, enter the server path URL to the new image in the Source box.
- Add an image description. Provide a clear text alternative description of the image for screen reader users (accessibility).
For best practices when creating alternative text, refer to these instructions about Alt text from WebAIM. (Suitable for beginners).
- Choose whether the image should be centered or right justified. (Optional)
Centered
Choose this for the image to appear left justified when the image is in its own paragraph.Right justified
Choose this for the image to appear right justified when the image is in its own paragraph. - Select OK.
Important: In the Edit Item window of the Simple Editor, the image appears where the cursor was in the box when you chose to insert an image. To see the image placement as it will appear to students, select the Save & Previewlink (top right).
- Resize the image in the item. (Optional)
Select the image and then drag it by a corner to make it proportionately smaller or larger. This action does not affect the size of the original file in the Image Manager. - To save your edit, select
 Save (from the top toolbar) or the Save & Preview link (top right). Do NOT press Ctrl+S (Windows) or Command-S (Mac OS).
You can copy and paste images within an item, but not among different items in the Simple Editor.
- Open the Simple Editor so that the item you want to edit appears in the Edit Item window.
-
Identify the box(es) where you want to copy and paste the image. Select
 show or
  hide, as needed.
 - Select the image and enter standard keyboard commands to first copy (Ctrl+C for Windows, Command-C for Mac OS) and then paste (Ctrl+V for Windows, Command-V for Mac OS) the image in another location in the item.
Image items that students use to answer ranking or sorting questions
These cannot be copied and pasted. However, you can repurpose item images between these answer types by either a) copying a ranking/sorting part question in an item and then switching the answer type to the opposite type or b) choosing images from the asset manager for an item as you add items to be ranked or sorted. More about the ranking or sorting answer types.
Edit images
You may want students to select a thumbnail or other small image to view content in a new browser window. The content you link to by supplying a URL might be for a larger image, media (video or animation), or a web page/site.
- Add a thumbnail image to your content, such as in the Introduction. For instructions, see the above section, “Add an image LESS than 1 MB”.
- Select the thumbnail image and choose
 Insert/edit link from the editing toolbar or Insert then Insert link from the toolbar menus.
The "Insert link" dialog box opens. - URL
Enter the URL for the web page you want students to see when they select the link.Best practice for URL: Whenever possible, it’s best to provide a URL that begins with https instead of http. The “s” stands for “secure”. The https protocol uses an SSL (secure sockets layer) certificate to create a secure encrypted connection. For more info, search the web for “http vs https definition”.
- Onclick (Optional)
Instead of entering the URL and Target as described in steps 3 and 5, you can enter the javascript browser window open command and the applicable URL. For example: javascript:wh=window.open(‘URL’).You can also include other window specifications, as shown in the sample javascript code below. Ending the command with "return false" prevents the default browser settings from taking effect.
javascript:wh=window.open('URL','new','resizable=yes,width=900,height=500,toolbar=no,menubar=no,location=no,titlebar=no,status=no,directories=no');return false
 Browser window characteristics you can specify via javascript
To control this characteristic Add this to the onClick javascript string Window size Height of window height=number_of_pixels Width of window width=number_of_pixels Ability of user to resize the window resizable=yes or resizable=no Display of browser elements Menu bar menubar=yes or menubar=no Scroll bars to scroll up or down scrollbars=yes or scrollbars=no Status bar status=yes or status=no Title bar titlebar=yes or titlebar=no Toolbar toolbar=yes or toolbar=no URL in address bar location=yes or location=no Directory buttons (may be obsolete) directories=yes or directories=no Multiple URLs For multiple links in a single item, open a separate window to display each URL. - Add a unique version of “wh=” (wh1, wh2, etc.) for each additional link URL. This enables each URL to appear in a separate window.
- Otherwise, each link would display in the original window identified as “wh”.
- Target
Select None if you want the link to open in the same window or New window to open in a new window. - Select OK.
- Test the image link
Select the Save & Preview link (top right).
To replace an image in an item, upload the new asset with the same name as the original image.
- Open the Simple Editor so that the item you want to edit appears in the Edit Item window.
- Identify the name of the image you want to replace.
Select the image and select
 Insert/edit image from the editing toolbar. The file name appears in the Source box. (You may need to press an arrow key to see the full name.) Close the Insert/edit image box.
 - Give the new image the same name as the image you want to replace.
- To add the new replacement image, follow the steps above to add an image that's either less than 1 MB or that's greater than 1 MB.
To view the position of an image, you must open the item in Standard View. (Your view of images in the Edit Item window of the Simple Editor does not reflect the final image position that students will see.)
Note: Although selecting an image and choosing Format, Alignment, and then Left/Center/Right/Justify may change the location of the image in your view of the Edit Item window of the Simple Editor, this action has no effect on the image position in Standard View (what students see).
- Open the Simple Editor and place your cursor in the text box where you want the image to appear.
- Choose
 Insert/edit image from the editing toolbar.
 - Identify the image, whether by uploading (for images less than 1 MB) or by referencing a source (for images greater than 1 MB), as described in the applicable section above.
- From the Insert/edit image dialog box, choose either Centered or Right justified and select OK.
- Centered — Select this for the image to appear left justified (when the image is in its own paragraph) or when you want an image to sit inline on the text baseline.
- Right justified — Select this for the image to appear right justified when the image is in its own paragraph.
- Select Save & Preview to see how the image is positioned in Standard View.
- Open the Simple Editor and select the image you want to reposition from a text box, such as for Instructions.
The selected image turns an opaque blue. - To set the image to a new general location, cut and paste the image within a text box.
To cut — Ctrl+X (Windows) orCommand-X (Mac OS)
To paste — Ctrl+V (Windows) or Command-V (Mac OS)
- Select the image again and choose
 Insert/edit image from the editing toolbar.
 - Choose either Centered or Right justified and select OK.
- Centered — Select this for the image to appear left justified (when the image is in its own paragraph) or when you want an image to sit inline on the text baseline.
- Right justified — Select this for the image to appear right justified when the image is in its own paragraph.
- Select Save & Preview to see how the image is positioned in Standard View.
To resize an image, select the image and drag it by a corner to make it proportionally smaller or larger. This action does not affect the size of the original file in the Asset Manager.
To resize an image to be ranked in a ranking question
Select on the image from the correct answer so that it opens in the “Edit item” dialog box. Select the image, drag it by a corner, and choose OK.
If you see a broken image icon in your view of the item in the Item Library, you may have moved the image file from its original location so that the item can no longer locate the image using the original path.
- Open the Simple Editor so that the item you want to edit appears in the Edit Item window.
- Identify the box where the image was originally inserted and select the image.
The editing toolbar and menus appear for you to make your edits.
- Select
 Insert/edit image from the editing toolbar.
If the image file is larger than 1MB: Update the server path URL in the Source field and skip to step 6.
-
In the Insert/edit image window, select
 Upload.
The Upload file(s) window opens, with a list of any previously uploaded files to help you manage your image assets. You can also open this window by selecting
 Asset Manager from the top toolbar.
 - If you see the image file name in the Filename list, choose Select in that row and then select Upload.
If you don't see the image file name in the Filename list, select Browse to locate the folder that now contains the image file. Then choose Select and Upload.
If you're not sure which folder contains the image:
Use your system's file search feature to get the complete path. - Select OK.
- To save your edit, select
 Save (from the top toolbar) or the Save & Preview link (top right). Do NOT press Ctrl+S (Windows) or Command-S (Mac OS).
Deleting the appearance of an image in an item does not delete it from the item's asset manager that contains it. For this task, see the next section.
- In the Edit Item window of the Simple Editor, select the image you want to remove from the item.
- Press the Delete key, the Backspace key, or use a keyboard shortcut: Ctrl+ X (Windows) or Command-X (Mac OS).
For images in some answer types, like ranking
For image items in the correct answer, select the X in the upper right corner of the image. For a background image, choose the X to the right of the image filename below the “Background image” button.
When previewing an item (not in the Simple Editor), you can select Manage Assets from the top right menu. The window that opens is similar to the Upload file(s) window, but has more features.
From here you can upload more images at a time, delete images, and you can see the status of an image (referenced or not, missing, and more) in the item.
See also:


