Timed assignments
Updated 07 Jan 2026
You can set a time limit on assignments. The timer starts as soon as a student selects  Start to begin a timed assignment. It continues to run until the student either completes the assignment or time runs out, whichever comes first.
- Students cannot pause the timer once it starts! Students lose any remaining time if they sign out; switch to a different assignment, window or page; or lose their internet connection.
If needed, you can reset the assignment for individual students to get a new chance at the assignment. Instructions provided below.
- Timed assignments usually allow only 1 student answer submission per question. This is because timed assignments commonly inherit this from either the Quiz or Test category (or someone set the answer attempts per question in the assignment to 1). This means students with time remaining cannot go back and change their answers.
- The due date for a timed assignment takes precedence over the timer. If there's time remaining on the timer but the due date has passed, students can no longer access the assignment. Late penalties do not apply to timed assignments.
- Don’t add extra credit items to timed assignments with regular credit items.
 Here's why
The timer stops when a student completes a timed assignment. If a timed assignment has a mix of regular credit and extra-credit items, students who complete all of the for-credit items will then be unable to work on the extra-credit items.
- Timed assignments are listed, but cannot be opened, on a mobile device. Advise your students to plan ahead to be at a computer to complete any timed assignments.
-
 An Adaptive Follow-Up assignment never has a time limit, even if it's added to a timed parent assignment. (Adaptive Follow-Ups are meant for students to work at their own pace.
You can try out the timed assignment experience by working through an assignment as a student.
- When students open a timed assignment, it says Timed Assignment and shows the amount of time allowed. They select Start (the timer begins to run) and select an item to begin working.

- On a mobile device, students see the assignment listed, but when they try to open it a message explains that they must use a computer to do a timed assignment.
- One minute warning: The time remaining changes from white to yellow for the last minute.
- When time is up (timer reaches 0): The timer changes to “TIME’S UP!”
You can make an assignment timed by changing one setting.
The Homework, Quiz, and Test assignment categories are not initially set to include a time limit. You can make a Mastering assignment in any category into a timed assignment.
- Create an assignment, if you haven't already.
- Open the assignment for editing, if it isn't already open.
- Select
 Items to check the estimated time to complete the assignment (top), such as
  .
. - If the assignment contains items that you've created or edited (My Items): You should account for these in the assignment time, since Mastering can’t estimate a time for your custom items. When an assignment contains a mix of publisher and custom items, Mastering provides the time for the publisher items with a plus sign, such as 20+ minutes.
- If the assignment is pooled, be sure to consider the longest estimated time if a range is shown for Estimated Time at the bottom of
 Organization.
- Select
 Settings and then
  .
. - In the Cheating Defense section, select Assignment Has a Time Limit and enter a number of minutes.
The time limit setting is unavailable if the assignment has been set to allow students multiple assignment attempts for best score.
- Select Save for this assignment only.
A clock icon
 now appears next to the assignment title when viewed in either List View or Calendar View. Point to the clock to see the time limit for timed assignments.
For the entire class:
- Select the
 timed assignment title from either the
  List View or
  Calendar View of your assignments.
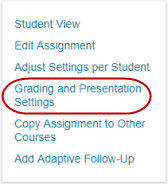
 - On the Overview page, select Grading and Presentation Settings from the assignment quick links (left).

- In the Cheating Defense section, change the time limit under Assignment Has a Time Limit, and then select Save for this assignment only.Be sure to enter the total time for the new time limit, not just the additional time.
For one or more students:
- Select the
 timed assignment title from either the
  List View or
  Calendar View of your assignments.
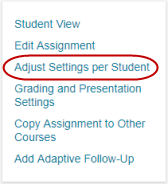
 - On the Overview page, select Adjust Settings per Student from the assignment quick links (left).
 .
. - In the Available Students list, select a student's name or Ctrl+click several names, and then select >>.
- Under Assignment Time Limit, either select Time allowed (minutes) and enter a new limit, or select No time limit. For the new time limit, be sure to enter the total time, not just the additional time.
- Select Save.
To help students complete a timed assignment, you may need to extend its time limit for one or more students. After you add more time, when students reopen the assignment the timer shows the remaining time and students can continue where they left off.
For one or more students:
- From the Assignments list, select the
 timed assignment title to open its Overview page.
 - Select Adjust Settings per Student from the assignment quick links (left).

- In the Available Students list, select a student's name or Ctrl+click several names, and then select >>.
- Under Assignment Time Limit, either select Time allowed (minutes) and enter a new limit, or select No time limit. For the new time limit, be sure to enter the total time, not just the additional time.
- Select Save.
For one student:
- Select the student's name to open the course Scores page for that student.
- On the student's Scores page, select the student's score link for the timed assignment you want.
- On the Assignment Grade page, select
 .
. - Next to Time allowed (minutes) enter a new limit, or select No time limit, and select Save. For the new time limit, be sure to enter the total time, not just the additional time.
If one or more students had their work on a timed assignment interrupted, you can reset a timed assignment so these students can retake the assignment. If needed, you can also revise the Time allowed (minutes) for these students.
- Select the
 timed assignment title from either the
  List View or
  Calendar View of your assignments.
 - On the Overview page, select Adjust Settings per Student from the assignment quick links (left).

- In the Available Students list, select a student's name or Ctrl+click several names, and then select >>.
- Under Reset Assignment, select Delete all work for this assignment and allow students to restart.
- Select Save.